Just add water!

Hey, oven lovers! This is a tiny little post to show you that the clay:sand mixture we use to build these super ovens can be recycled (or rejuvenated).

As you will see, if you read my previous post, I had to do some pretty major repairs to my oven recently. Anyone who has gone to the effort of building one of these ovens will tell you that the most tedious part of the whole process is puddling the clay:sand mixture. It is hard work and very boring so, while you are going to the bother of doing it, I recommend mixing a little more than you need and storing the extra in plastic sacks. You will use it for filling cracks and maybe, one day, to undertake more major repair work. You might also need to partially, or even wholly, remove one of the dry layers, particularly if you abuse your oven as much as I have mine. Well don’t throw that dry stuff away, and if your bagged material is dry, make sure you keep that too.

All you need to do is add some water to it, leave it for a while and, hey presto, it’s as good as new. Sweet!!

3, 2, 1…..You’re back in the room!

Almost two years! I can’t believe the last time I posted on here was almost two years ago. That is just crazy! I have been really busy with other life stuff (mostly the day job) but still – TWO YEARS! Anyway, I’m back (in the room!) and raring to go.

I know you are all dying to know how my oven is (aren’t you?). Anyone who has spent any time reading through previous posts on this blog will have noticed that, periodically, there is a blog post about how badly I have neglected my oven and then how I have gone about fixing it up. Well, for the sake of consistency (nothing to do with laziness!) I am sad to say that I have done it again.

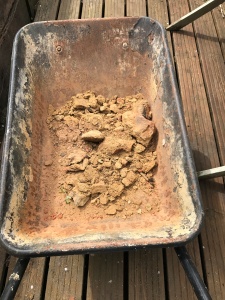
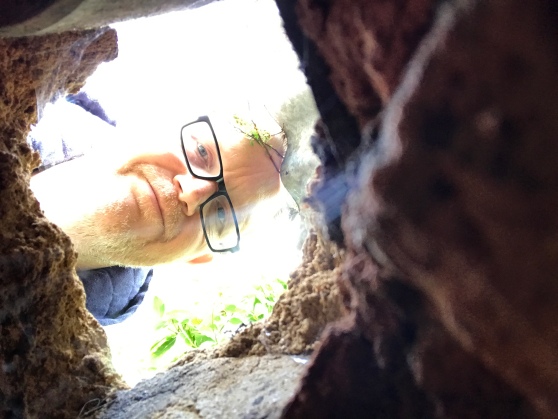
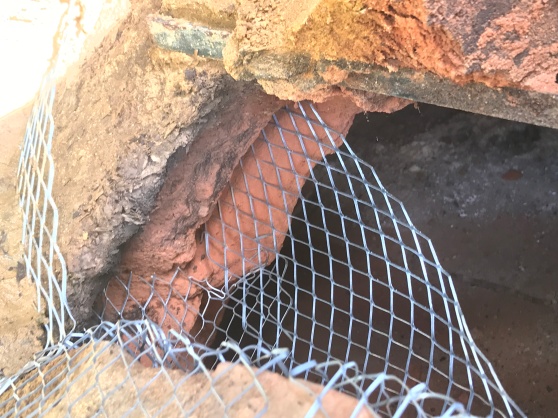
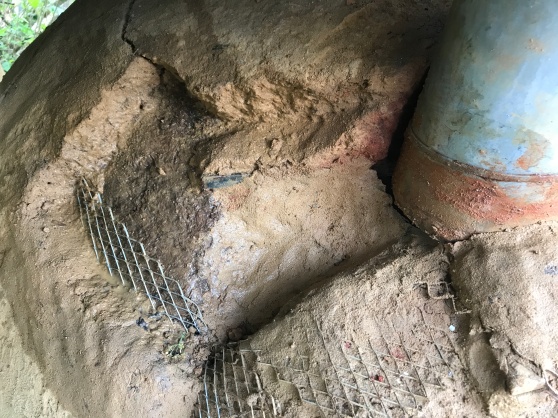
Have a look at the next few photos – it’s really bad this time isn’t it?

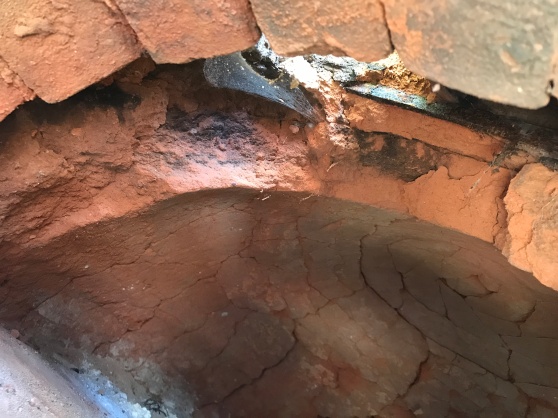
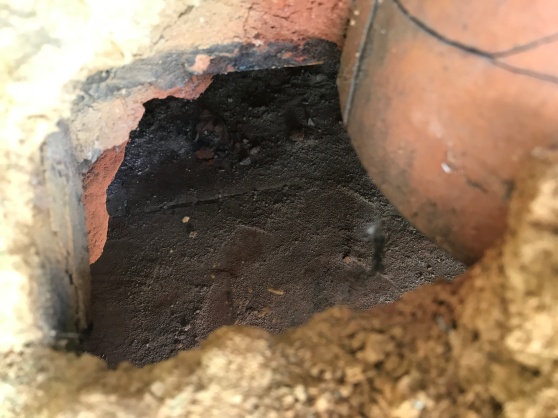
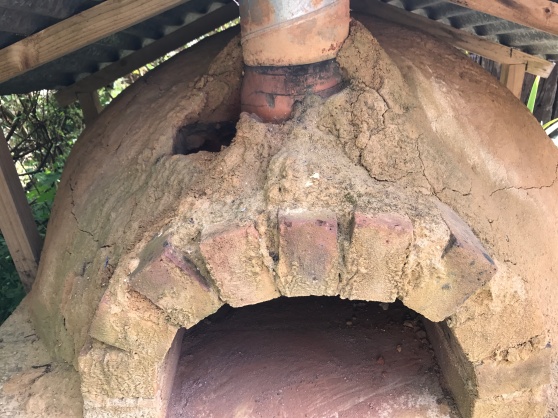
Not only a whopping, great hole but this time a hole in the inner oven layer, which is a problem. This is all water damage by the way. My roof has lots of holes and, critically,  water runs down the outside of the chimney and erodes the oven layers. In previous states of neglect, the inner (oven) layer has stayed pretty much intact. However, this time it has not! The big problem with this is that, while it is relatively easy to replace the outer two layers, replacing the inner layer would essentially mean smashing the whole thing apart and building a new oven from scratch, and I really didn’t want to do that!

So, how to fix it? Well, if I could find a way to fix some sort of structural support across the hole, I think I it would be possible to add some sand:clay mixture to plug it. But what to use? After a visit to my local DIY store, I found just the thing – EML!

EML or galvanised Expanded Metal Lath Sheet is wire mesh used by plasterers as a key for certain types of walls and ceilings. I managed to get a roll of this stuff which was just perfect for the job. It is really easy to cut (with wire snips), light in weight and moulds well into the organic shapes required for fixing my oven.

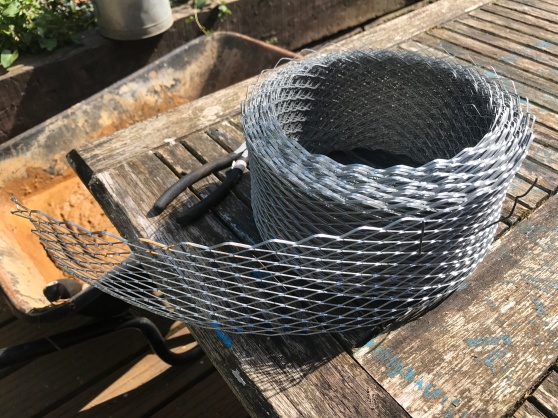
EML – Galvanised Expanded Metal Lathing Sheet

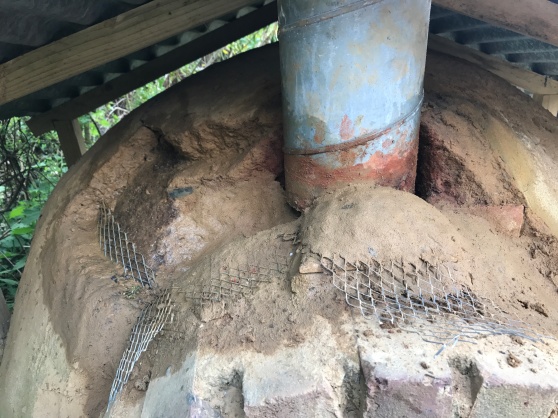
So how did I go about using this stuff|? Firstly, I removed the chimney and some of the outer layers of the oven from around the hole. I then carved a groove into the centre of the cross-section of the inner oven layer in order to create a space to receive one end of a length of the EML. I formed the other end of the EML to fold over the rear lip of the brick arch (it’s hard to describe, so have a look at the following photos).

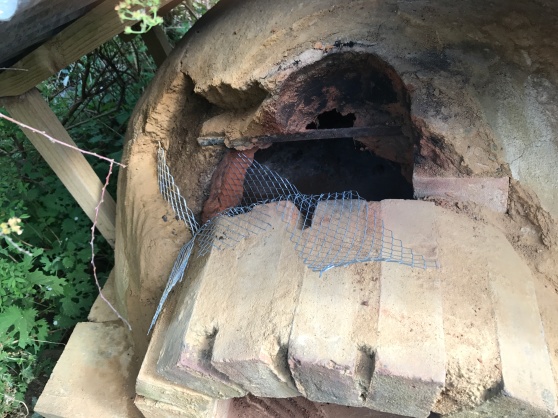
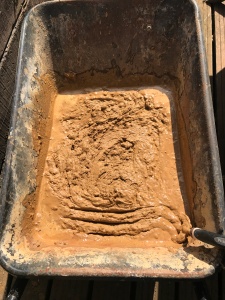
You will also see that I added more of the EML mesh on top of the second layer, also moulded over the brick arch. The plan was to then add wet sand:clay mixture to secure the ends of the EML in place and then to fill up the gaps (the hole) with more of the same material.

The following series of photos shows how this progressed.

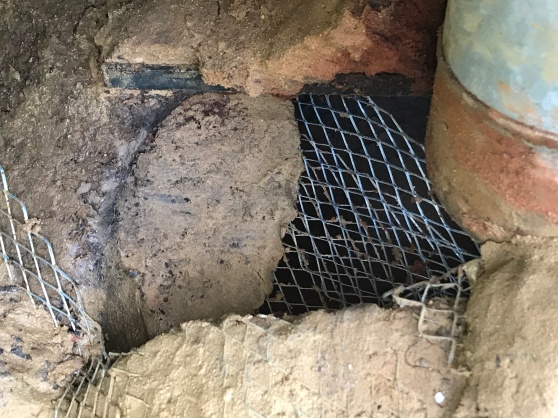
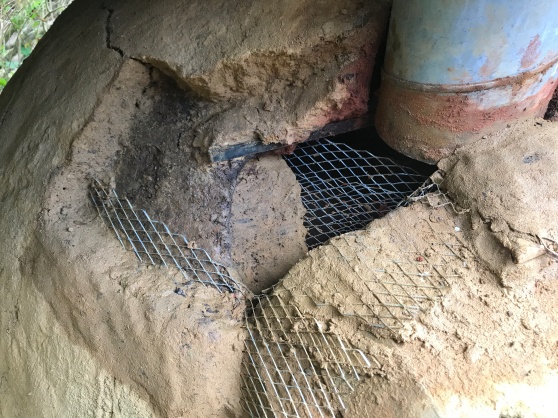
I gradually pressed the sand:clay mixture into the gaps and onto the mesh, building up layers until the hole was repaired.

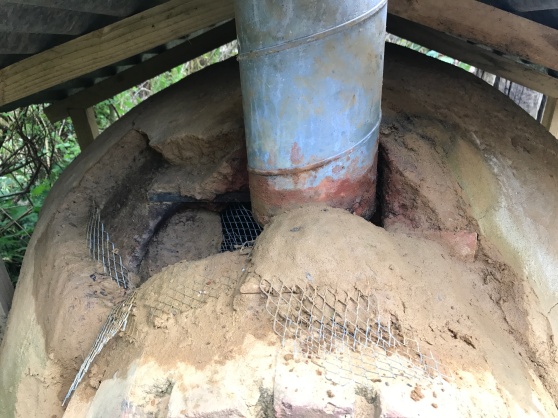
Here’s a couple of photos of the finished, newly repaired oven.

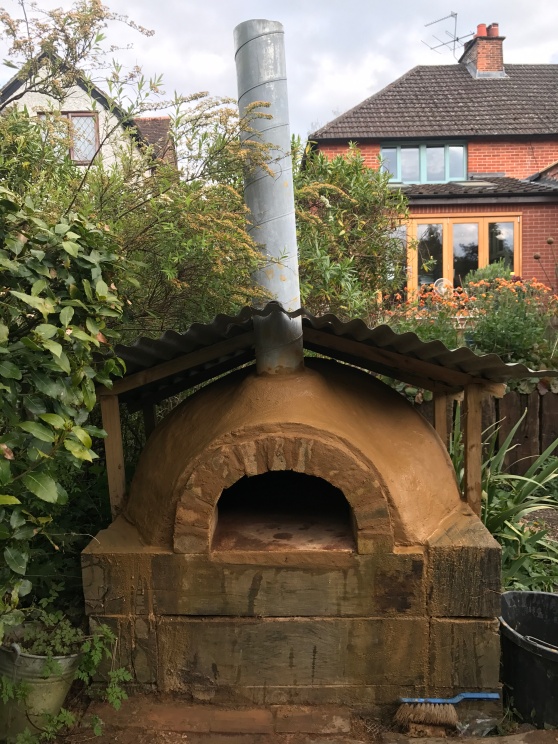
I think she looks rather wonderful again!

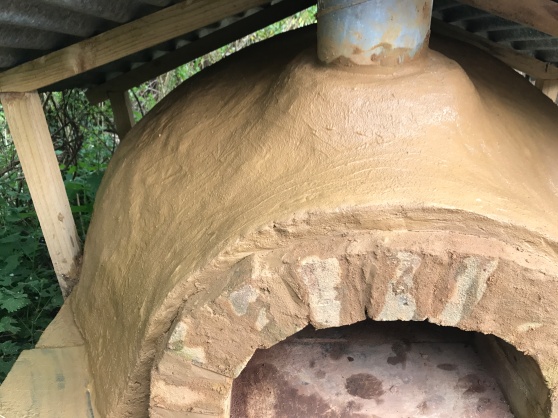
It’ll take some time for the oven to dry, and I’m sure some new cracks will appear as it does but they can be plugged with more mixture.

So what have we learnt? Firstly, I’m terrible at looking after my oven. If only I had bothered to cover it properly with a tarp, over winter, I wouldn’t have had to do any of this (my bad!). Secondly, these ovens can be repaired to full working order, even after serious neglect. Finally, this little oven is incredible. It is now 9 years old which, given how badly I treat it, demonstrates how incredibly robust they are.

I won’t let this happen again – honest!

Delicious Magazine Article

Delicious Article on WebsiteJust a bit of shameless self-promotion here. Delicious magazine have just updates their website and have made a shiny new version of the article published last year about my oven (and how to build one!).

Although it contains most of the information you’d need to build a pizza oven, the devil is in the detail, most of which can be found in my eBook (funny that!!!) 🙂

Here’s the link:

http://www.deliciousmagazine.co.uk/stories/how-to-build-a-wood-fired-pizza-oven-2/

Oven Recipes: Tandoori Chicken and Naan Bread

IMG_1725Tandoori chicken has to be one of the most popular Indian dishes, and while making it at home is fairly straight forward, recreating that authentic flavour you get from an Indian restaurant can be difficult to achieve in the home kitchen. This is because the best tandoori chicken is cooked in a tandoor – essentially a very hot clay oven. Tandoor’s produce chicken that is moist on the inside and slightly charred on the outside. What’s true for tandoori chicken is also true for tandoor baked naan bread, the most delicious of which are soft and chewy inside but with a slightly blackened, blistered surface. Tandoors are essentially vertical clay ovens and so it’ll probably be no surprise to learn that our traditional clay/pizza ovens are excellent at producing authentic flavoured tandoori chicken and naan breads. This has to be one of my favourite recipes. The following method shows you how to make it

Tandoori Chicken (Serves 4)

1 whole chicken, jointed into eight pieces, or 1.5kg chicken pieces (legs, thighs, wings etc.) skinned

Marinade One
Juice of 2 limes
1tsp chilli powder
1 tsp sea salt

Marinade Two
100g natural yoghurt
4 cloves garlic, chopped
5cm piece of ginger, chopped
1tsp Garam masala
1tsp turmeric
1tsp ground cumin
1/2 tsp of beetroot powder or natural red food colouring

Mix the ingredients for marinade one into a large bowl. Add the chicken pieces and rub with the marinade. Cover with clingfilm and leave in fridge for 1 hour.

Put the marinade two ingredients into a food processor (the mini versions are good) and blitz to a smooth paste. Add to the chicken and stir well to coat. Cover and return to fridge for at least 4 hours.

Next prepare your naan breads.

Naan Bread (Makes 6)

200g plain flour
100g strong white flour
1 tsp sugar
1.5 tsp dried yeast
1 tsp sea salt
100ml milk
100ml water
4 tbsp natural yoghurt
2 tbsp melted ghee (or butter)

Mix the dry ingredients into a large mixing bowl (or the bowl of your mixer with a bread hook, if you have one). Warm the milk and water together in a pan until blood temperature (approx. 40°C). Add the yoghurt and melted ghee to the dry ingredients, followed by the milk/water mixture. Mix together until you form a soft dough (add a little more water if you need to). Knead for 5 minutes, either in your mixer or on a floured surface, until smooth. Return to a clean bowl, cover and leave somewhere warm for 1 hour until it has doubled in size. Turn out onto a lightly floured surface and knead for a few more minutes. Cut the dough into 6 even sized pieces, roll into balls and cover again until ready to bake.

Fire your oven to full temperature (this can take an hour or more so calculate the timings carefully between firing the oven and preparing the food). Allow temperature to drop to around 300°C. Keep fire burning but clear a space for a large roasting tin.

Roasting the chicken

Place the marinated chicken pieces onto a wire rack and then put this into a large roasting tin (ideally the former should fit inside the latter). Add a small cup of water to the bottom of the tin and cover with foil (the water produces steam which helps keep the chicken moist). Place the roasting tin into your oven. You should soon hear the chicken start to sizzle. Check the chicken after 20 minutes, it should be cooking nicely but not charred. Remove the foil and put the roasting tin back into your oven for another 10-15 minutes. The heat from your oven should begin to char the chicken – be careful not to overdo it! Make sure the chicken is cooked through and cover again with foil to rest while you bake the naan breads.

Baking the naan breads

Roll each dough ball into a tear shape. They should be approximately 3-5mm thick. I like to cook my naan breads on the brick floor of my oven, so at this stage I clear a space using a wire brush. If you prefer, you can cook the breads on a metal baking tray or cast iron skillet – remember to pop them into the oven though first so they get nice and hot. Your oven should be around the 250 – 220°C mark. Place the rolled dough into the oven and watch it carefully. With any luck it will begin to inflate, rather like a balloon. You should also see it begin to scorch a little. Once you are happy it is done, brush it with some melted ghee or butter, place on a warmed plate and cover with foil while you cook the rest of the batch.

Squeeze chicken with lemon juice and serve with a naan and some salad (and a cold beer). Delicious!