 Tandoori chicken has to be one of the most popular Indian dishes, and while making it at home is fairly straight forward, recreating that authentic flavour you get from an Indian restaurant can be difficult to achieve in the home kitchen. This is because the best tandoori chicken is cooked in a tandoor – essentially a very hot clay oven. Tandoor’s produce chicken that is moist on the inside and slightly charred on the outside. What’s true for tandoori chicken is also true for tandoor baked naan bread, the most delicious of which are soft and chewy inside but with a slightly blackened, blistered surface. Tandoors are essentially vertical clay ovens and so it’ll probably be no surprise to learn that our traditional clay/pizza ovens are excellent at producing authentic flavoured tandoori chicken and naan breads. This has to be one of my favourite recipes. The following method shows you how to make it
Tandoori Chicken (Serves 4)
1 whole chicken, jointed into eight pieces, or 1.5kg chicken pieces (legs, thighs, wings etc.) skinned
Marinade One
Juice of 2 limes
1tsp chilli powder
1 tsp sea salt
Marinade Two
100g natural yoghurt
4 cloves garlic, chopped
5cm piece of ginger, chopped
1tsp Garam masala
1tsp turmeric
1tsp ground cumin
1/2 tsp of beetroot powder or natural red food colouring
Mix the ingredients for marinade one into a large bowl. Add the chicken pieces and rub with the marinade. Cover with clingfilm and leave in fridge for 1 hour.
Put the marinade two ingredients into a food processor (the mini versions are good) and blitz to a smooth paste. Add to the chicken and stir well to coat. Cover and return to fridge for at least 4 hours.
Next prepare your naan breads.
Naan Bread (Makes 6)
200g plain flour
100g strong white flour
1 tsp sugar
1.5 tsp dried yeast
1 tsp sea salt
100ml milk
100ml water
4 tbsp natural yoghurt
2 tbsp melted ghee (or butter)
Mix the dry ingredients into a large mixing bowl (or the bowl of your mixer with a bread hook, if you have one). Warm the milk and water together in a pan until blood temperature (approx. 40°C). Add the yoghurt and melted ghee to the dry ingredients, followed by the milk/water mixture. Mix together until you form a soft dough (add a little more water if you need to). Knead for 5 minutes, either in your mixer or on a floured surface, until smooth. Return to a clean bowl, cover and leave somewhere warm for 1 hour until it has doubled in size. Turn out onto a lightly floured surface and knead for a few more minutes. Cut the dough into 6 even sized pieces, roll into balls and cover again until ready to bake.
Fire your oven to full temperature (this can take an hour or more so calculate the timings carefully between firing the oven and preparing the food). Allow temperature to drop to around 300°C. Keep fire burning but clear a space for a large roasting tin.
Roasting the chicken
Place the marinated chicken pieces onto a wire rack and then put this into a large roasting tin (ideally the former should fit inside the latter). Add a small cup of water to the bottom of the tin and cover with foil (the water produces steam which helps keep the chicken moist). Place the roasting tin into your oven. You should soon hear the chicken start to sizzle. Check the chicken after 20 minutes, it should be cooking nicely but not charred. Remove the foil and put the roasting tin back into your oven for another 10-15 minutes. The heat from your oven should begin to char the chicken – be careful not to overdo it! Make sure the chicken is cooked through and cover again with foil to rest while you bake the naan breads.
-
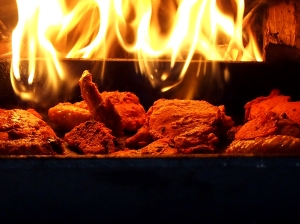
- Hot Hot Hot!
-
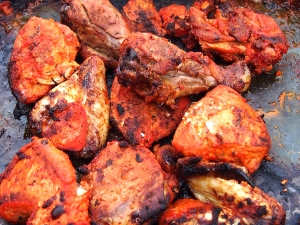
- Delicious Tandoori Chicken
-
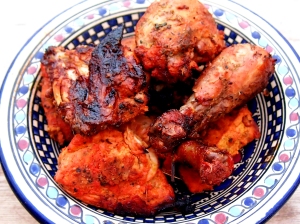
- Tuck in!
Baking the naan breads
Roll each dough ball into a tear shape. They should be approximately 3-5mm thick. I like to cook my naan breads on the brick floor of my oven, so at this stage I clear a space using a wire brush. If you prefer, you can cook the breads on a metal baking tray or cast iron skillet – remember to pop them into the oven though first so they get nice and hot. Your oven should be around the 250 – 220°C mark. Place the rolled dough into the oven and watch it carefully. With any luck it will begin to inflate, rather like a balloon. You should also see it begin to scorch a little. Once you are happy it is done, brush it with some melted ghee or butter, place on a warmed plate and cover with foil while you cook the rest of the batch.
Squeeze chicken with lemon juice and serve with a naan and some salad (and a cold beer). Delicious!
-
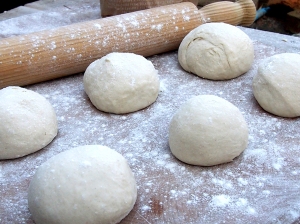
- Dough balls ready to roll
-
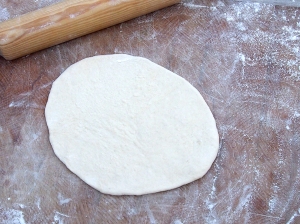
- Rolled out
-
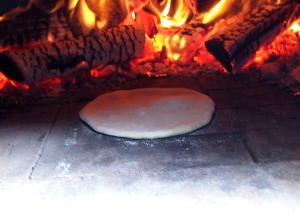
- Nice hot oven, naan straight onto floor.
-

- Starting to inflate
-
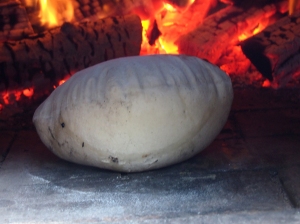
- Naan fully inflated
-

- A pile of naan bread ready to eat


